|
This article is geared towards those of you daily working with mud log PDF's in multiple scales. When you are generating or receiving daily reports that include a log in multiple scales, to differentiate quickly is a must. A new feature in Mainlog addresses this nicely. By simply checking one box, Mainlog will add the scale in large letters to the mud log header. The scale is large enough to discern even when working with thumbnails. This has proven helpful when using email clients such as Gmail. It has been nice to open my emails and to quickly glance at the thumbnails to see which mud log I want to view. To use this feature, simply check "Print Type label in Header" in the print setup screen. 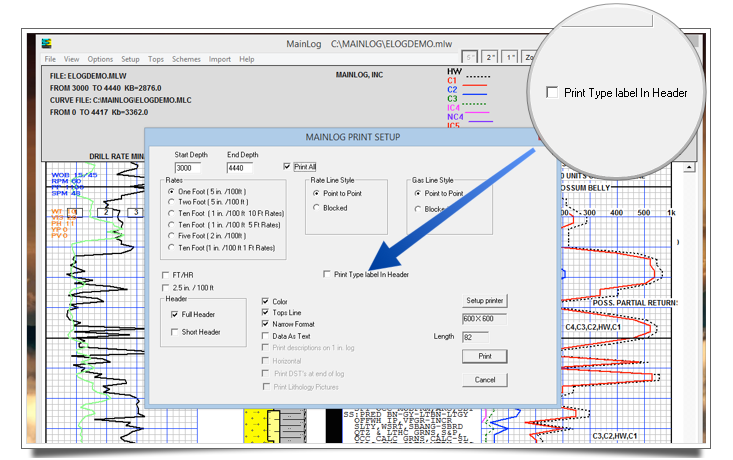 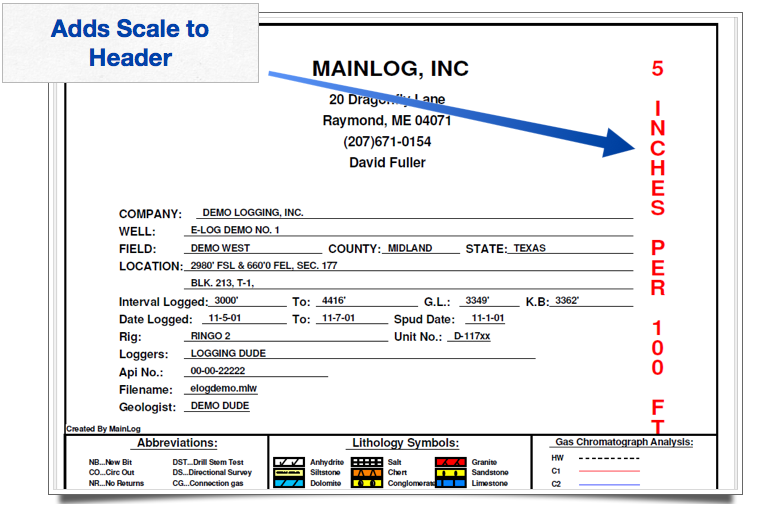
0 Comments
Using LasApps software: Data Step Conversion
1. Use MainLog to generate an LAS file of the mud log as you normally would 2. Launch the LasApps software from the desktop icon 3. From the File menu choose “Select Files” 4. A window will open allowing you to navigate to the LAS file you wish to process. The path is: C:\mainlog\mudloglas or C:\mainlog\sendfile if you have MainLog setup to generate the LAS automatically 5. Click on the correct LAS file in the center pane, then click the select button. 6. Click the “Continue” to pull that file into the program for processing 7. At this point the LAS has been loaded into the program and is ready to be processed. **Note, screen will be blank – LAS text does not show up inside work area** 8. Click “Processes” from the menu bar, then select “Routine LAS Processes” 9. Leave the items checked in the first section “Prepare LAS Files” 10. Check the box “Depth and Step Related Items” 11. Check the box “Set depth step on all LAS files to:” 12. Enter in the desired step value (Example: 0.50 for half foot step value) 13. Click “Continue” to begin processing 14. A dialog box will appear showing the progress. This can take a while depending on how much data you are processing. 15. After data is processed, you will see a small box that says “done..”, click “OK” 16. Click “Close” to get out of the “Routine LAS processes” box 17. Now that you have processed the LAS, you must save it 18. Click on the blue “Save” in the upper LH corner 19. This will launch an Explorer window, navigate to the directory in which best suits your workflow. For most people this might be the “Desktop”. 20. Click “OK” to save the processed LAS file, you are now free to exit the LasApps program. Size/ Email Issues: Please note that this program generates a considerably larger file. From the tests we have performed, it is usually 6 x larger than the original file. As the well progresses, the file will become too large for email. To combat this, please see the following steps: 1. Right click on the file you wish to send and select “Send to” -> “Compressed (zipped) folder” 2. A new folder will then appear in the directory in which you are working. At this point the name is highlighted in blue. You can just name it LAS File. 3. Simply attach the zip folder to your email as you normally would. Using the compression will dramatically decrease the file size. Once the client downloads the zip folder from their email, they can simply right click the file and choose “Extract All”. Then follow the prompts to extract the file. Once they extract the file, it will decompress to its original size. Installation: To install the Program, simply visit the following link: http://www.nucleus.com/~kcpetrophysics/LasApps2_4.exe The program is free to use without license. There is also a pro version of this software available with extra features at additional cost. For more information on this great software: http://www.kcpetrophysics.com/index.html For information and resources, visit the Canadian Well Logging Society: http://www.cwls.org/las/ Contact: Jason Grubbs 940-549-6275 for assistance |
AuthorStivers Consulting, Inc. Archives
October 2015
Categories |
 RSS Feed
All Rights Reserved 2023, Stivers Consulting, Inc. | 216 Oak Street Graham, TX 76450